Rust GPUI 开发尝试
本文档记录了我在使用 Rust 语言进行图形用户界面(GUI)开发时的一些尝试和经验。由于 GPUI 目前并不成熟且未发布较稳定版本,后续改动可能很大,可能会有内容不完整或错误的地方,欢迎指正和补充。
Get Started Crates.io
引入依赖
[dependencies]
gpui = "0.2.2"
GPUI 中的窗口使用 struct 来声明,内部内容自定义,可以用来修改或用作其他用途。
例如,我接下来创建了一个 struct,我将其作为主窗口。
struct MainUI {
    title: SharedString,
}
定义好了一个 struct 后,对其重写实现 Render trait,就可以将其作为窗口内容进行渲染。
impl Render for MainUI {
    fn render(&mut self, _window: &mut gpui::Window, _cx: &mut gpui::Context
<Self>) -> impl gpui::IntoElement {
        div()
            .text_2xl()
            .child(format!("Welcome to {}", self.title))
    }
}
这个 render() 需要一个返回 impl gpui::IntoElement 的值,表示窗口的内容。窗口内容写法与 HTML 类似,可以使用 div()、span() 等标签函数来创建元素,并通过链式调用添加样式和子元素。现仅粗略阐述。
最后使用 Application::new() 创建应用程序实例,然后 run(|cx| { ... }) 启动应用程序。
fn main() {
    Application::new()
        .run(|cx| {
            cx.open_window(
                WindowOptions {
                    ..Default::default()
                },
                |_, cx| {
                    cx.new(|_| MainUI {
                        title: "My First GPUI App!".into(),
                    })
                }
            )
            .unwrap();
        });
}
这样,一个简单的 GPUI 应用程序就完成了。
Application::new().run() 需要传入一个 on_finish_launching 闭包,该闭包在应用启动完成后执行,接收一个 &mut gpui::App 类型的 cx 参数。通过 cx 可以调用 open_window() 打开窗口。open_window() 的第一个参数是 WindowOptions,用于配置窗口属性;第二个参数是一个闭包,用于创建窗口内容。这个闭包内部再调用 cx.new(),并传入一个返回实现了 Render trait 的结构体的闭包,从而完成窗口内容的构造。
由此,可以看到 GPUI 为我们生成了一个简单的窗口:
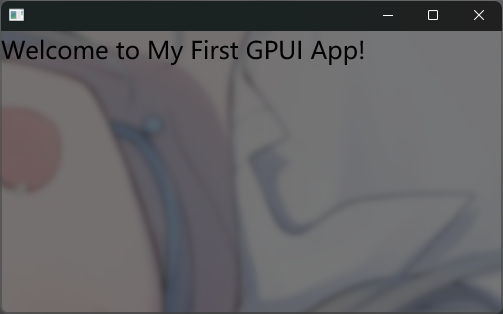
没有设置背景和文字颜色,默认是透明窗口和黑字,还可以看到 text_2xl() 确实生效了。
可以尝试对窗口进行一些修改:
impl Render for MainUI {
    fn render(&mut self, _window: &mut gpui::Window, _cx: &mut gpui::Context
<Self>) -> impl gpui::IntoElement {
        div()
            .text_2xl()
            .size_full()
            .bg(rgba(0x39C5BB88))
            .child(format!("Welcome to {}", self.title))
            .text_bg(rgb(0x114514))
    }
}
可以看到背景占满了整个窗口,并且设置了半透明背景色和文字背景色:

可以继续修改 WindowOptions 来对窗口进行更多定义:
把主 Div 的背景色改为 rgba(0x39C5BB11),能够清晰看到效果。
WindowOptions {
    titlebar: Some(TitlebarOptions {
        title: Some("My GPUI App".into()),
        ..Default::default()
    }),
    window_background: WindowBackgroundAppearance::Blurred,
    ..Default::default()
}
效果:
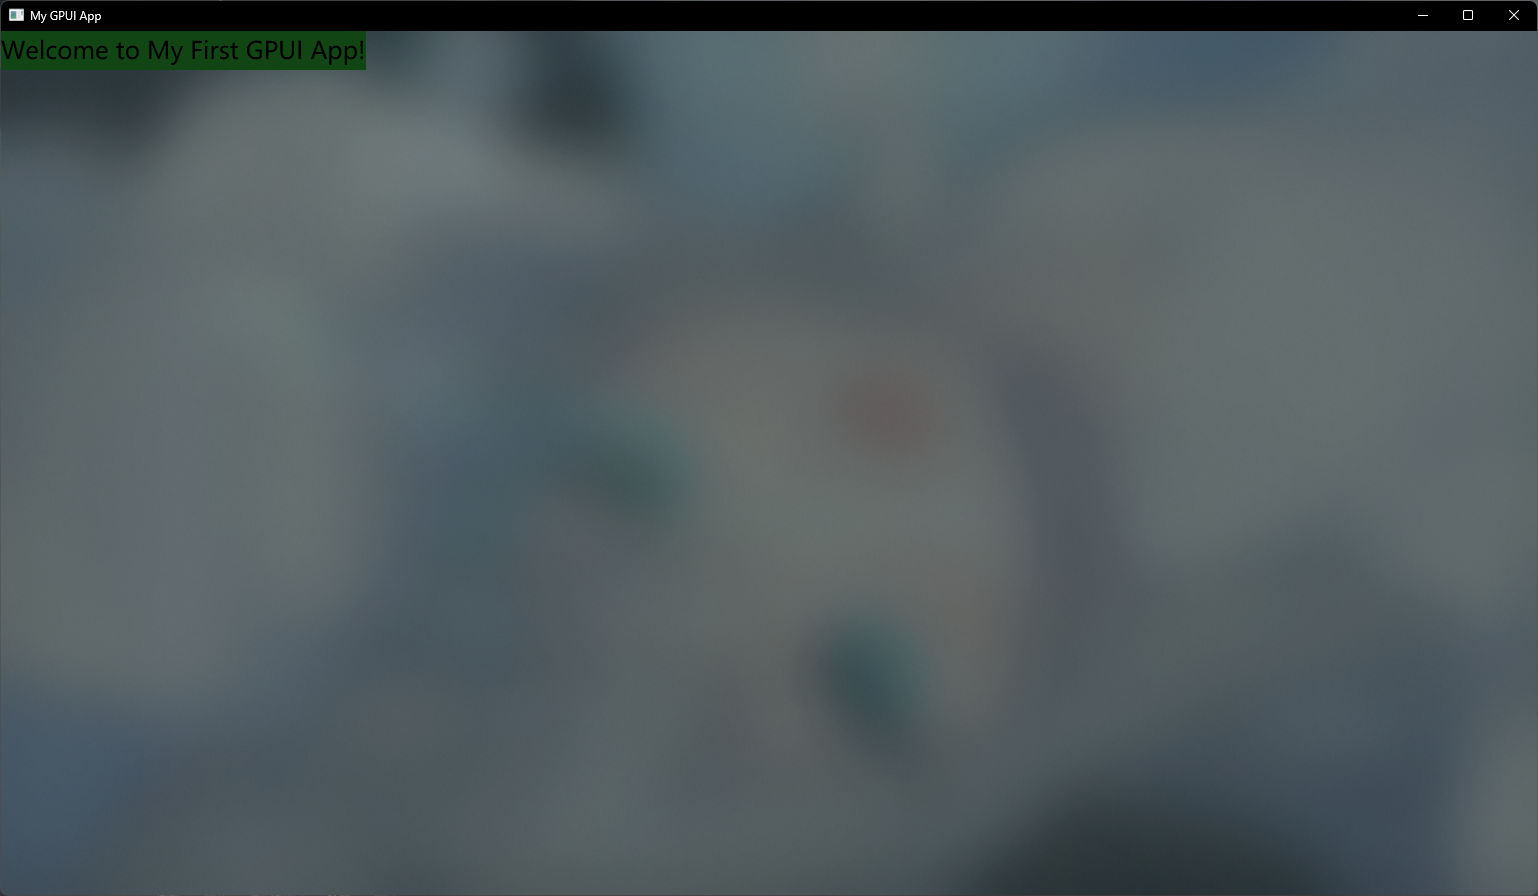
这样就完美地添加了标题和模糊背景效果。
列表与点击事件
此内容参考 GPUI 示例代码。
在此示例中,创建了一个有 50 个元素的列表,并为每个元素添加了点击事件。
struct MainUI {}

impl Render for MainUI {
    fn render(&mut self, _window: &mut gpui::Window, cx: &mut gpui::Context<Self>) -> impl gpui::IntoElement {
        div()
            .size_full()
            .bg(rgb(0xffffff))
            .child(
                uniform_list(
                    "entries",
                    50,
                    cx.processor(|_this, range, _window, _cx| {
                        let mut items = Vec::new();
                        for ix in range {
                            let item = ix + 1;

                            items.push(
                                div()
                                    .id(ix)
                                    .px_2()
                                    .cursor_pointer()
                                    .on_click(move |_event, _window, _cx| {
                                        println!("Clicked item {item:?}");
                                    })
                                    .child(format!("Item {item}"))
                            );
                        }
                        items
                    }),
                )
                .h_full()
            )
    }
}
不难发现,使用了 uniform_list() 来创建一个列表,第一个参数是列表的标识符(id),第二个参数是列表项的数量,第三个参数是一个处理器闭包,用于生成列表项。第三个参数中,cx.processor() 用于创建一个处理器闭包,接收当前范围 range,并返回一个包含列表项的向量。在每个列表项中,使用 on_click() 方法为其添加点击事件处理器,当点击该项时,会打印出被点击的项的编号。processor() 方法接受了一个闭包,该闭包接收四个参数:this(当前组件的引用)、range(当前处理的范围)、window(窗口引用)和 cx(上下文引用)。在闭包内部,遍历 range,为每个索引创建一个 div 元素,并为其添加点击事件处理器。闭包返回值是一个包含所有列表项的向量,此向量被 processor() 方法用来生成列表内容。故此处 items: Vec<impl gpui::IntoElement> 亦即 items: Vec<Stateful<Div>>。
h_full() 方法用于设置列表的高度为满高。
items.push(
    div()
        .id(ix)
        .px_2()
        .cursor_pointer()
        .on_click(move |_event, _window, _cx| {
            println!("Clicked item {item:?}");
        })
        .child(format!("Item {item}"))
);此处声明的是每个列表项的内容。id() 方法填入一个 ix 作为该项的唯一标识符,px_2() 添加了水平内边距,cursor_pointer() 设置鼠标悬停时显示为指针样式,on_click() 方法为该项添加了点击事件处理器。最后,使用 child() 方法添加了显示文本。
on_click() 方法接收一个闭包作为参数,该闭包在点击事件发生时被调用。闭包接收三个参数:event(事件对象)、window(窗口引用)和 cx(上下文引用)。在闭包内部,可以编写处理点击事件的逻辑,例如打印被点击的项的编号。
然后不要忘记在 main() 函数中创建并运行应用程序:
fn main() {
    Application::new().run(|cx| {
        let bounds = Bounds::centered(None, size(px(300.0), px(300.0)), cx);
        cx.open_window(
            WindowOptions {
                window_bounds: Some(WindowBounds::Windowed(bounds)),
                ..Default::default()
            },
            |_, cx| {
                cx.new(|_| MainUI {})
            }
        )
        .unwrap();
    });
}
WindowOptions::window_bounds 用于设置窗口的大小和位置,此处创建了一个 300x300 像素的窗口并居中显示。
最后打开的窗口效果如下:
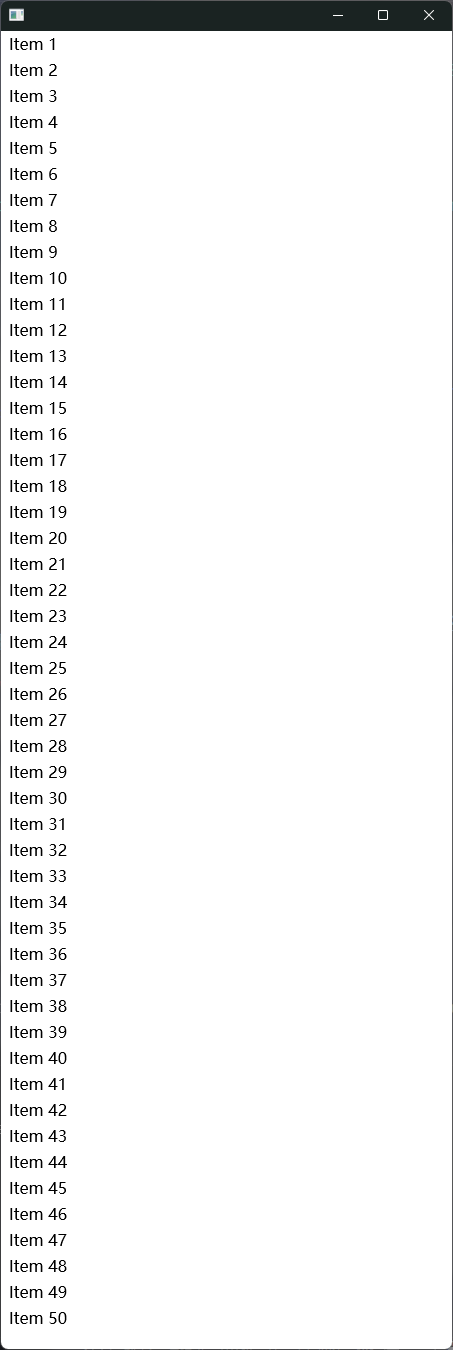
可以发现鼠标指针变成了可操作手势样式,当点击某个元素后,控制台会输出被点击的项的编号:

动画
此内容参考 GPUI 示例代码。
这个示例展示了如何在 GPUI 中实现简单的动画效果。我们使用一个 SVG 图形,并通过修改其属性来实现动画。
这个示例需要 anyhow 依赖:
anyhow = "1.0.101"首先,保存一下这个 SVG 图像 到本地,记录一下这个 SVG 的路径:
const ARROW_CIRCLE_SVG: &str = "./arrow_circle.svg";然后建立一个结构体 Assets 来存储加载的 SVG 资源:
struct Assets {}对此结构体实现 AssetSource trait,以便在应用启动时加载 SVG 资源:
impl AssetSource for Assets {
    fn load(&self, path: &str) -> gpui::Result<Option<std::borrow::Cow<'static, [u8]>>> {
        std::fs::read(path)
            .map(|i| i.into())
            .map_err(|e| e.into())
            .map(|i| Some(i))
    }

    fn list(&self, path: &str) -> gpui::Result<Vec<gpui::SharedString>> {
        Ok(std::fs::read_dir(path)?
            .filter_map(|entry| {
                Some(SharedString::from(
                    entry.ok()?.path().to_string_lossy().into_owned(),
                ))
            })
            .collect::<Vec<_>>())
    }
}
可见,我们对 load() 方法进行了实现,从指定路径读取文件内容并返回;list() 方法则列出指定目录下的所有文件。实现了 AssetSource trait 后,我们可以在应用启动时加载 SVG 资源。
Application::new().with_assets(Assets {}).run( ... );with_assets() 方法用于指定应用程序的资源加载器,这里传入了我们刚刚实现的 Assets 结构体实例。
然后对主界面 AnimationApp 进行定义:
struct AnimationApp {}实现 Render trait 来定义界面内容:
impl Render for AnimationApp {
    fn render(
        &mut self,
        _window: &mut gpui::Window,
        _cx: &mut gpui::Context
<Self>,
    ) -> impl gpui::IntoElement {
        div()
            .flex()
            .flex_col()
            .size_full()
            .bg(white())
            .text_color(black())
            .justify_around()
            .child(
                div()
                    .flex()
                    .flex_col()
                    .size_full()
                    .justify_around()
                    .child(
                        div()
                            .id("content")
                            .flex()
                            .flex_col()
                            .h(px(150.))
                            .overflow_y_scroll()
                            .w_full()
                            .flex_1()
                            .justify_center()
                            .items_center()
                            .text_xl()
                            .gap_4()
                            .child("Hello Animation!")
                            .child(
                                svg()
                                    .size_20()
                                    .overflow_hidden()
                                    .path(ARROW_CIRCLE_SVG)
                                    .text_color(black())
                                    .with_animation(
                                        "image_circle",
                                        Animation::new(Duration::from_secs(2))
                                            .repeat()
                                            .with_easing(bounce(ease_out_quint())),
                                        |svg, delta| {
                                            svg.with_transformation(Transformation::rotate(
                                                percentage(delta),
                                            ))
                                        },
                                    ),
                            ),
                    )
                    .child(
                        div()
                            .flex()
                            .h(px(64.))
                            .w_full()
                            .p_2()
                            .justify_center()
                            .items_center()
                            .border_t_1()
                            .border_color(black().opacity(0.1))
                            .bg(black().opacity(0.05))
                            .child("Other..."),
                    ),
            )
    }
}
声明的一些东西:
-
flex()和flex_col()用于设置弹性布局和列方向.什么是弹性布局? 弹性布局(Flexbox)是一种 CSS 布局模型,允许容器内的子元素根据可用空间动态调整大小和位置。通过设置容器为弹性布局,可以轻松实现响应式设计和复杂的布局结构。
-
justify_around()用于在主轴上均匀分布子元素,并在每个子元素之间留有间隔。 -
overflow_y_scroll()用于在垂直方向上启用滚动条(由于内容较少,此声明几乎无效)。 -
items_center()用于在交叉轴上居中对齐子元素。 -
justify_center()用于在主轴上居中对齐子元素。 -
svg()用于创建一个 SVG 元素。 -
path(ARROW_CIRCLE_SVG)用于指定 SVG 图像的路径。 -
with_animation()用于为 SVG 元素添加动画效果。 -
Animation::new(Duration::from_secs(2))创建一个持续时间为 2 秒的动画。 -
repeat()方法使动画循环播放。 -
with_easing(bounce(ease_out_quint()))设置动画的缓动函数,使动画具有弹跳效果。 -
闭包
|svg, delta| { ... }用于定义动画的具体效果,此处通过Transformation::rotate(percentage(delta))实现旋转效果。
最后,在 main() 函数中创建并运行应用程序:
fn main() {
    Application::new().with_assets(Assets {}).run(|cx| {
        let options = WindowOptions {
            window_bounds: Some(WindowBounds::Windowed(Bounds::centered(
                None,
                size(px(300.), px(300.)),
                cx,
            ))),
            ..Default::default()
        };
        cx.open_window(options, |_, cx| {
            cx.activate(false);
            cx.new(|_| AnimationApp {})
        })
        .unwrap();
    });
}
可见效果如下:

侦测输入
此内容参考 GPUI 示例代码。
在这个示例中,我们将展示如何在 GPUI 中侦测键盘和鼠标输入事件。
本示例需要引入 unicode-segmentation 依赖:
unicode-segmentation = "1.12.0"使用 actions! 宏来定义一个输入事件处理器:
actions!(
    text_input,
    [
        Backspace,
        Delete,
        Left,
        Right,
        SelectLeft,
        SelectRight,
        SelectAll,
        Home,
        End,
        ShowCharacterPalette,
        Paste,
        Cut,
        Copy,
        Quit,
    ]
);
然后定义一个 TextInput 结构体存储当前状态:
struct TextInput {
    focus_handle: FocusHandle,              // 焦点句柄
    content: SharedString,                  // 输入内容
    placeholder: SharedString,              // 占位符文本
    selected_range: Range
<usize>,           // 选择范围
    selection_reversed: bool,               // 选择是否反向
    marked_range: Option<Range<usize>>,     // 标记范围(用于输入法)
    last_layout: Option
<ShapedLine>,        // 上一次的布局信息
    last_bounds: Option<Bounds<Pixels>>,    // 上一次的边界信息
    is_selecting: bool,                     // 是否正在选择文本
}注意:此处的 `Range
` 来源于 `std::ops::Range`,用于表示文本选择的起始和结束位置。若使用 `std::range::Range` 会出现编译错误。
接着,对这个结构体进行一系列实现:
先实现一个 move_to() 方法,用于移动光标位置:
fn move_to(&mut self, offset: usize, cx: &mut Context
<Self>) {
    self.selected_range = offset..offset;
    cx.notify();
}其中,notify() 方法用于通知 GPUI 重新渲染界面。
实现一个 select_to() 方法,用于更新选择范围:
fn select_to(&mut self, offset: usize, cx: &mut Context
<Self>) {
    if self.selection_reversed {
        self.selected_range.start = offset
    } else {
        self.selected_range.end = offset
    };
    if self.selected_range.end < self.selected_range.start {
        // 反转选择方向
        self.selection_reversed = !self.selection_reversed;
        self.selected_range = self.selected_range.end..self.selected_range.start;
    }
    cx.notify()
}
实现一下 previous_boundry() 和 next_boundry() 方法,用于计算文本边界:
fn previous_boundary(&self, offset: usize) -> usize {
    self.content
        .grapheme_indices(true)
        .rev()
        .find_map(|(idx, _)| (idx < offset).then_some(idx))
        .unwrap_or(0)
}
fn next_boundary(&self, offset: usize) -> usize {
    self.content
        .grapheme_indices(true)
        .find_map(|(idx, _)| (idx > offset).then_some(idx))
        .unwrap_or(self.content.len())
}
在此处,我们使用了 unicode-segmentation 提供的 grapheme_indices() 方法来获取文本的字符边界,以便正确处理 Unicode 字符。grapheme_indices(true) 返回一个迭代器,提供文本中每个字符的起始索引和对应的字符。通过 find_map() 方法,我们可以找到第一个满足条件的边界索引,从而实现光标移动和文本选择功能。
实现 reset() 方法,用于重置输入状态:
fn reset(&mut self) {
    self.content = "".into();
    self.selected_range = 0..0;
    self.selection_reversed = false;
    self.marked_range = None;
    self.last_layout = None;
    self.last_bounds = None;
    self.is_selecting = false;
}
实现 EntityInputHandler trait 来处理输入事件:
impl EntityInputHandler for TextInput {
    fn text_for_range(
        &mut self,
        range_utf16: Range
<usize>,
        actual_range: &mut Option<Range<usize>>,
        _window: &mut Window,
        _cx: &mut Context
<Self>,
    ) -> Option
<String> {
        let range = self.range_from_utf16(&range_utf16);
        actual_range.replace(self.range_to_utf16(&range));
        Some(self.content[range].to_string())
    }

    fn selected_text_range(
        &mut self,
        _ignore_disabled_input: bool,
        _window: &mut Window,
        _cx: &mut Context
<Self>,
    ) -> Option
<UTF16Selection> {
        Some(UTF16Selection {
            range: self.range_to_utf16(&self.selected_range),
            reversed: self.selection_reversed,
        })
    }

    fn marked_text_range(
        &self,
        _window: &mut Window,
        _cx: &mut Context
<Self>,
    ) -> Option<Range<usize>> {
        self.marked_range
            .as_ref()
            .map(|range| self.range_to_utf16(range))
    }

    fn unmark_text(&mut self, _window: &mut Window, _cx: &mut Context
<Self>) {
        self.marked_range = None;
    }

    fn replace_text_in_range(
        &mut self,
        range_utf16: Option<Range<usize>>,
        new_text: &str,
        _: &mut Window,
        cx: &mut Context
<Self>,
    ) {
        let range = range_utf16
            .as_ref()
            .map(|range_utf16| self.range_from_utf16(range_utf16))
            .or(self.marked_range.clone())
            .unwrap_or(self.selected_range.clone());

        self.content =
            (self.content[0..range.start].to_owned() + new_text + &self.content[range.end..])
                .into();
        self.selected_range = range.start + new_text.len()..range.start + new_text.len();
        self.marked_range.take();
        cx.notify();
    }

    fn replace_and_mark_text_in_range(
        &mut self,
        range_utf16: Option<Range<usize>>,
        new_text: &str,
        new_selected_range_utf16: Option<Range<usize>>,
        _window: &mut Window,
        cx: &mut Context
<Self>,
    ) {
        let range = range_utf16
            .as_ref()
            .map(|range_utf16| self.range_from_utf16(range_utf16))
            .or(self.marked_range.clone())
            .unwrap_or(self.selected_range.clone());

        self.content =
            (self.content[0..range.start].to_owned() + new_text + &self.content[range.end..])
                .into();
        if !new_text.is_empty() {
            self.marked_range = Some(range.start..range.start + new_text.len());
        } else {
            self.marked_range = None;
        }
        self.selected_range = new_selected_range_utf16
            .as_ref()
            .map(|range_utf16| self.range_from_utf16(range_utf16))
            .map(|new_range| new_range.start + range.start..new_range.end + range.end)
            .unwrap_or_else(|| range.start + new_text.len()..range.start + new_text.len());

        cx.notify();
    }

    fn bounds_for_range(
        &mut self,
        range_utf16: Range
<usize>,
        bounds: Bounds
<Pixels>,
        _window: &mut Window,
        _cx: &mut Context
<Self>,
    ) -> Option<Bounds<Pixels>> {
        let last_layout = self.last_layout.as_ref()?;
        let range = self.range_from_utf16(&range_utf16);
        Some(Bounds::from_corners(
            point(
                bounds.left() + last_layout.x_for_index(range.start),
                bounds.top(),
            ),
            point(
                bounds.left() + last_layout.x_for_index(range.end),
                bounds.bottom(),
            ),
        ))
    }

    fn character_index_for_point(
        &mut self,
        point: gpui::Point
<Pixels>,
        _window: &mut Window,
        _cx: &mut Context
<Self>,
    ) -> Option
<usize> {
        let line_point = self.last_bounds?.localize(&point)?;
        let last_layout = self.last_layout.as_ref()?;

        assert_eq!(last_layout.text, self.content);
        let utf8_index = last_layout.index_for_x(point.x - line_point.x)?;
        Some(self.offset_to_utf16(utf8_index))
    }
}
实现 copy() cut() 和 paste() 方法,用于处理剪贴板操作:
fn paste(&mut self, _: &Paste, window: &mut Window, cx: &mut Context
<Self>) {
    if let Some(text) = cx.read_from_clipboard().and_then(|item| item.text()) {
        self.replace_text_in_range(None, &text.replace("\n", " "), window, cx);
    }
}
fn copy(&mut self, _: &Copy, _: &mut Window, cx: &mut Context
<Self>) {
    if !self.selected_range.is_empty() {
        cx.write_to_clipboard(ClipboardItem::new_string(
            self.content[self.selected_range.clone()].to_string(),
        ));
    }
}
fn cut(&mut self, _: &Cut, window: &mut Window, cx: &mut Context
<Self>) {
    if !self.selected_range.is_empty() {
        cx.write_to_clipboard(ClipboardItem::new_string(
            self.content[self.selected_range.clone()].to_string(),
        ));
        self.replace_text_in_range(None, "", window, cx)
    }
}
依照这样,将其他事件也补全:
impl TextInput {
    fn left(&mut self, _: &Left, _: &mut Window, cx: &mut Context
<Self>) {
        if self.selected_range.is_empty() {
            self.move_to(self.previous_boundary(self.cursor_offset()), cx);
        } else {
            self.move_to(self.selected_range.start, cx)
        }
    }

    fn right(&mut self, _: &Right, _: &mut Window, cx: &mut Context
<Self>) {
        if self.selected_range.is_empty() {
            self.move_to(self.next_boundary(self.selected_range.end), cx);
        } else {
            self.move_to(self.selected_range.end, cx)
        }
    }

    fn select_left(&mut self, _: &SelectLeft, _: &mut Window, cx: &mut Context
<Self>) {
        self.select_to(self.previous_boundary(self.cursor_offset()), cx);
    }

    fn select_right(&mut self, _: &SelectRight, _: &mut Window, cx: &mut Context
<Self>) {
        self.select_to(self.next_boundary(self.cursor_offset()), cx);
    }

    fn select_all(&mut self, _: &SelectAll, _: &mut Window, cx: &mut Context
<Self>) {
        self.move_to(0, cx);
        self.select_to(self.content.len(), cx)
    }

    fn home(&mut self, _: &Home, _: &mut Window, cx: &mut Context
<Self>) {
        self.move_to(0, cx);
    }

    fn end(&mut self, _: &End, _: &mut Window, cx: &mut Context
<Self>) {
        self.move_to(self.content.len(), cx);
    }

    fn backspace(&mut self, _: &Backspace, window: &mut Window, cx: &mut Context
<Self>) {
        if self.selected_range.is_empty() {
            self.select_to(self.previous_boundary(self.cursor_offset()), cx)
        }
        self.replace_text_in_range(None, "", window, cx)
    }

    fn delete(&mut self, _: &Delete, window: &mut Window, cx: &mut Context
<Self>) {
        if self.selected_range.is_empty() {
            self.select_to(self.next_boundary(self.cursor_offset()), cx)
        }
        self.replace_text_in_range(None, "", window, cx)
    }

    fn on_mouse_down(
        &mut self,
        event: &MouseDownEvent,
        _window: &mut Window,
        cx: &mut Context
<Self>,
    ) {
        self.is_selecting = true;

        if event.modifiers.shift {
            self.select_to(self.index_for_mouse_position(event.position), cx);
        } else {
            self.move_to(self.index_for_mouse_position(event.position), cx)
        }
    }

    fn on_mouse_up(&mut self, _: &MouseUpEvent, _window: &mut Window, _: &mut Context
<Self>) {
        self.is_selecting = false;
    }

    fn on_mouse_move(&mut self, event: &MouseMoveEvent, _: &mut Window, cx: &mut Context
<Self>) {
        if self.is_selecting {
            self.select_to(self.index_for_mouse_position(event.position), cx);
        }
    }

    fn show_character_palette(
        &mut self,
        _: &ShowCharacterPalette,
        window: &mut Window,
        _: &mut Context
<Self>,
    ) {
        window.show_character_palette();
    }

    fn paste(&mut self, _: &Paste, window: &mut Window, cx: &mut Context
<Self>) {
        if let Some(text) = cx.read_from_clipboard().and_then(|item| item.text()) {
            self.replace_text_in_range(None, &text.replace("\n", " "), window, cx);
        }
    }

    fn copy(&mut self, _: &Copy, _: &mut Window, cx: &mut Context
<Self>) {
        if !self.selected_range.is_empty() {
            cx.write_to_clipboard(ClipboardItem::new_string(
                self.content[self.selected_range.clone()].to_string(),
            ));
        }
    }
    fn cut(&mut self, _: &Cut, window: &mut Window, cx: &mut Context
<Self>) {
        if !self.selected_range.is_empty() {
            cx.write_to_clipboard(ClipboardItem::new_string(
                self.content[self.selected_range.clone()].to_string(),
            ));
            self.replace_text_in_range(None, "", window, cx)
        }
    }

    fn move_to(&mut self, offset: usize, cx: &mut Context
<Self>) {
        self.selected_range = offset..offset;
        cx.notify()
    }

    fn cursor_offset(&self) -> usize {
        if self.selection_reversed {
            self.selected_range.start
        } else {
            self.selected_range.end
        }
    }

    fn index_for_mouse_position(&self, position: Point
<Pixels>) -> usize {
        if self.content.is_empty() {
            return 0;
        }

        let (Some(bounds), Some(line)) = (self.last_bounds.as_ref(), self.last_layout.as_ref())
        else {
            return 0;
        };
        if position.y < bounds.top() {
            return 0;
        }
        if position.y > bounds.bottom() {
            return self.content.len();
        }
        line.closest_index_for_x(position.x - bounds.left())
    }

    fn select_to(&mut self, offset: usize, cx: &mut Context
<Self>) {
        if self.selection_reversed {
            self.selected_range.start = offset
        } else {
            self.selected_range.end = offset
        };
        if self.selected_range.end < self.selected_range.start {
            self.selection_reversed = !self.selection_reversed;
            self.selected_range = self.selected_range.end..self.selected_range.start;
        }
        cx.notify()
    }

    fn offset_from_utf16(&self, offset: usize) -> usize {
        let mut utf8_offset = 0;
        let mut utf16_count = 0;

        for ch in self.content.chars() {
            if utf16_count >= offset {
                break;
            }
            utf16_count += ch.len_utf16();
            utf8_offset += ch.len_utf8();
        }

        utf8_offset
    }

    fn offset_to_utf16(&self, offset: usize) -> usize {
        let mut utf16_offset = 0;
        let mut utf8_count = 0;

        for ch in self.content.chars() {
            if utf8_count >= offset {
                break;
            }
            utf8_count += ch.len_utf8();
            utf16_offset += ch.len_utf16();
        }

        utf16_offset
    }

    fn range_to_utf16(&self, range: &Range
<usize>) -> Range<usize> {
        self.offset_to_utf16(range.start)..self.offset_to_utf16(range.end)
    }

    fn range_from_utf16(&self, range_utf16: &Range
<usize>) -> Range<usize> {
        self.offset_from_utf16(range_utf16.start)..self.offset_from_utf16(range_utf16.end)
    }

    fn previous_boundary(&self, offset: usize) -> usize {
        self.content
            .grapheme_indices(true)
            .rev()
            .find_map(|(idx, _)| (idx < offset).then_some(idx))
            .unwrap_or(0)
    }

    fn next_boundary(&self, offset: usize) -> usize {
        self.content
            .grapheme_indices(true)
            .find_map(|(idx, _)| (idx > offset).then_some(idx))
            .unwrap_or(self.content.len())
    }

    fn reset(&mut self) {
        self.content = "".into();
        self.selected_range = 0..0;
        self.selection_reversed = false;
        self.marked_range = None;
        self.last_layout = None;
        self.last_bounds = None;
        self.is_selecting = false;
    }
}
完整的实现如上所示。通过这些方法,我们可以处理各种输入事件,包括键盘输入、鼠标点击等,从而实现一个功能完整的文本输入组件。
接下来,开始构建界面:
我们需要一个输入框,照理也需要建立一个 struct 来把这个对象存储起来:
struct TextElement {
    input: Entity
<TextInput>
}
此 Entity<TextInput> 是一个 GPUI 实体,表示一个可交互的组件,这里我们将 TextInput 作为其输入处理器。
然后实现 IntoElement trait 来定义界面元素,在此之前要把 Element 给 TextElement 实现一下:
struct TextElement {
    input: Entity
<TextInput>,
}

impl Element for TextElement {
    type RequestLayoutState = ();
    type PrepaintState = PrepaintState;

    fn id(&self) -> Option
<ElementId> {
        None
    }

    fn source_location(&self) -> Option<&'static std::panic::Location<'static>> {
        None
    }

    fn request_layout(
        &mut self,
        _id: Option<&GlobalElementId>,
        _inspector_id: Option<&gpui::InspectorElementId>,
        window: &mut Window,
        cx: &mut App,
    ) -> (LayoutId, Self::RequestLayoutState) {
        let mut style = Style::default();
        style.size.width = relative(1.).into();
        style.size.height = window.line_height().into();
        (window.request_layout(style, [], cx), ())
    }

    fn prepaint(
        &mut self,
        _id: Option<&GlobalElementId>,
        _inspector_id: Option<&gpui::InspectorElementId>,
        bounds: Bounds
<Pixels>,
        _request_layout: &mut Self::RequestLayoutState,
        window: &mut Window,
        cx: &mut App,
    ) -> Self::PrepaintState {
        let input = self.input.read(cx);
        let content = input.content.clone();
        let selected_range = input.selected_range.clone();
        let cursor = input.cursor_offset();
        let style = window.text_style();

        let (display_text, text_color) = if content.is_empty() {
            (input.placeholder.clone(), hsla(0., 0., 0., 0.2))
        } else {
            (content, style.color)
        };

        let run = TextRun {
            len: display_text.len(),
            font: style.font(),
            color: text_color,
            background_color: None,
            underline: None,
            strikethrough: None,
        };
        let runs = if let Some(marked_range) = input.marked_range.as_ref() {
            vec![
                TextRun {
                    len: marked_range.start,
                    ..run.clone()
                },
                TextRun {
                    len: marked_range.end - marked_range.start,
                    underline: Some(UnderlineStyle {
                        color: Some(run.color),
                        thickness: px(1.0),
                        wavy: false,
                    }),
                    ..run.clone()
                },
                TextRun {
                    len: display_text.len() - marked_range.end,
                    ..run
                },
            ]
            .into_iter()
            .filter(|run| run.len > 0)
            .collect()
        } else {
            vec![run]
        };

        let font_size = style.font_size.to_pixels(window.rem_size());
        let line = window
            .text_system()
            .shape_line(display_text, font_size, &runs, None);

        let cursor_pos = line.x_for_index(cursor);
        let (selection, cursor) = if selected_range.is_empty() {
            (
                None,
                Some(fill(
                    Bounds::new(
                        point(bounds.left() + cursor_pos, bounds.top()),
                        size(px(2.), bounds.bottom() - bounds.top()),
                    ),
                    gpui::blue(),
                )),
            )
        } else {
            (
                Some(fill(
                    Bounds::from_corners(
                        point(
                            bounds.left() + line.x_for_index(selected_range.start),
                            bounds.top(),
                        ),
                        point(
                            bounds.left() + line.x_for_index(selected_range.end),
                            bounds.bottom(),
                        ),
                    ),
                    rgba(0x3311ff30),
                )),
                None,
            )
        };
        PrepaintState {
            line: Some(line),
            cursor,
            selection,
        }
    }
    fn paint(
        &mut self,
        _id: Option<&GlobalElementId>,
        _inspector_id: Option<&gpui::InspectorElementId>,
        bounds: Bounds
<Pixels>,
        _request_layout: &mut Self::RequestLayoutState,
        prepaint: &mut Self::PrepaintState,
        window: &mut Window,
        cx: &mut App,
    ) {
        let focus_handle = self.input.read(cx).focus_handle.clone();
        window.handle_input(
            &focus_handle,
            ElementInputHandler::new(bounds, self.input.clone()),
            cx,
        );
        if let Some(selection) = prepaint.selection.take() {
            window.paint_quad(selection)
        }
        let line = prepaint.line.take().unwrap();
        line.paint(
            bounds.origin,
            window.line_height(),
            window,
            cx,
        )
        .unwrap();

        if focus_handle.is_focused(window)
            && let Some(cursor) = prepaint.cursor.take()
        {
            window.paint_quad(cursor);
        }

        self.input.update(cx, |input, _cx| {
            input.last_layout = Some(line);
            input.last_bounds = Some(bounds);
        });
    }
}
如上, Element trait 定义了组件的布局和绘制逻辑。在 request_layout() 方法中,我们设置了组件的大小;在 prepaint() 方法中,我们计算了文本的显示内容、颜色、光标位置等信息;在 paint() 方法中,我们根据预先计算的信息绘制文本、选择区域和光标。
使用到关键词 type 的地方是为了定义关联类型,这些类型在 trait 中被声明,但具体的类型由实现该 trait 的结构体来确定。在 Element trait 中,我们声明了 RequestLayoutState 和 PrepaintState 这两个关联类型,分别用于表示布局请求的状态和预绘制的状态。在 TextElement 的实现中,我们将 RequestLayoutState 定义为 ()(表示没有特定的状态),而 PrepaintState 则定义为一个包含文本布局、光标和选择信息的结构体。
实现 Render trait 来显示 TextInput :
impl Render for TextInput {
    fn render(&mut self, _window: &mut Window, cx: &mut Context
<Self>) -> impl IntoElement {
        div()
            .flex()
            .key_context("TextInput")
            .track_focus(&self.focus_handle(cx))
            .cursor(CursorStyle::IBeam)
            .on_action(cx.listener(Self::backspace))
            .on_action(cx.listener(Self::delete))
            .on_action(cx.listener(Self::left))
            .on_action(cx.listener(Self::right))
            .on_action(cx.listener(Self::select_left))
            .on_action(cx.listener(Self::select_right))
            .on_action(cx.listener(Self::select_all))
            .on_action(cx.listener(Self::home))
            .on_action(cx.listener(Self::end))
            .on_action(cx.listener(Self::show_character_palette))
            .on_action(cx.listener(Self::paste))
            .on_action(cx.listener(Self::cut))
            .on_action(cx.listener(Self::copy))
            .on_mouse_down(MouseButton::Left, cx.listener(Self::on_mouse_down))
            .on_mouse_up(MouseButton::Left, cx.listener(Self::on_mouse_up))
            .on_mouse_up_out(MouseButton::Left, cx.listener(Self::on_mouse_up))
            .on_mouse_move(cx.listener(Self::on_mouse_move))
            .bg(rgb(0xeeeeee))
            .line_height(px(30.))
            .text_size(px(24.))
            .child(
                div()
                    .h(px(30. + 4. * 2.))
                    .w_full()
                    .p(px(4.))
                    .bg(white())
                    .child(TextElement { input: cx.entity() }),
            )
    }
}
方法 cursor() 用于设置鼠标悬停时的光标样式,这里我们使用了 CursorStyle::IBeam,表示文本输入时常见的竖线光标。
其他常见光标见 GPUI 定义:
/// The style of the cursor (pointer)
#[derive(Copy, Clone, Debug, PartialEq, Eq, Hash, Serialize, Deserialize, JsonSchema)]
pub enum CursorStyle {
    /// The default cursor
    Arrow,

    /// A text input cursor
    /// corresponds to the CSS cursor value `text`
    IBeam,

    /// A crosshair cursor
    /// corresponds to the CSS cursor value `crosshair`
    Crosshair,

    /// A closed hand cursor
    /// corresponds to the CSS cursor value `grabbing`
    ClosedHand,

    /// An open hand cursor
    /// corresponds to the CSS cursor value `grab`
    OpenHand,

    /// A pointing hand cursor
    /// corresponds to the CSS cursor value `pointer`
    PointingHand,

    /// A resize left cursor
    /// corresponds to the CSS cursor value `w-resize`
    ResizeLeft,

    /// A resize right cursor
    /// corresponds to the CSS cursor value `e-resize`
    ResizeRight,

    /// A resize cursor to the left and right
    /// corresponds to the CSS cursor value `ew-resize`
    ResizeLeftRight,

    /// A resize up cursor
    /// corresponds to the CSS cursor value `n-resize`
    ResizeUp,

    /// A resize down cursor
    /// corresponds to the CSS cursor value `s-resize`
    ResizeDown,

    /// A resize cursor directing up and down
    /// corresponds to the CSS cursor value `ns-resize`
    ResizeUpDown,

    /// A resize cursor directing up-left and down-right
    /// corresponds to the CSS cursor value `nesw-resize`
    ResizeUpLeftDownRight,

    /// A resize cursor directing up-right and down-left
    /// corresponds to the CSS cursor value `nwse-resize`
    ResizeUpRightDownLeft,

    /// A cursor indicating that the item/column can be resized horizontally.
    /// corresponds to the CSS cursor value `col-resize`
    ResizeColumn,

    /// A cursor indicating that the item/row can be resized vertically.
    /// corresponds to the CSS cursor value `row-resize`
    ResizeRow,

    /// A text input cursor for vertical layout
    /// corresponds to the CSS cursor value `vertical-text`
    IBeamCursorForVerticalLayout,

    /// A cursor indicating that the operation is not allowed
    /// corresponds to the CSS cursor value `not-allowed`
    OperationNotAllowed,

    /// A cursor indicating that the operation will result in a link
    /// corresponds to the CSS cursor value `alias`
    DragLink,

    /// A cursor indicating that the operation will result in a copy
    /// corresponds to the CSS cursor value `copy`
    DragCopy,

    /// A cursor indicating that the operation will result in a context menu
    /// corresponds to the CSS cursor value `context-menu`
    ContextualMenu,

    /// Hide the cursor
    None,
}
on_action() 方法用于绑定键盘事件处理器,例如当用户按下 Backspace 键时,会调用 Self::backspace 方法来处理删除操作。参见上述定义,在实际项目中可以通过 actions! 宏来定义这些事件处理器,以便更清晰地组织代码。事件实现细节请参见前文 TextInput 结构体的实现部分。
on_mouse_down()、on_mouse_up() 和 on_mouse_move() 方法则用于处理鼠标事件,允许用户通过鼠标点击和拖动来选择文本。
对 TextInput 实现 Focusable trait 来支持焦点管理:
impl Focusable for TextInput {
    fn focus_handle(&self, _: &App) -> FocusHandle {
        self.focus_handle.clone()
    }
}
定义 TextExample 结构体作为主界面:
struct InputExample {
    text_input: Entity
<TextInput>,
    recent_keystrokes: Vec
<Keystroke>,
    focus_handle: FocusHandle,
}

impl Focusable for InputExample {
    fn focus_handle(&self, _: &App) -> FocusHandle {
        self.focus_handle.clone()
    }
}

impl InputExample {
    fn on_reset_click(&mut self, _: &MouseUpEvent, _window: &mut Window, cx: &mut Context
<Self>) {
        self.recent_keystrokes.clear();
        self.text_input
            .update(cx, |text_input, _cx| text_input.reset());
        cx.notify();
    }
}

impl Render for InputExample {
    fn render(&mut self, _window: &mut Window, cx: &mut Context
<Self>) -> impl IntoElement {
        div()
            .bg(rgb(0xaaaaaa))
            .track_focus(&self.focus_handle(cx))
            .flex()
            .flex_col()
            .size_full()
            .child(
                div()
                    .bg(white())
                    .border_b_1()
                    .border_color(black())
                    .flex()
                    .flex_row()
                    .justify_between()
                    .child(format!("Keyboard {}", cx.keyboard_layout().name()))
                    .child(
                        div()
                            .border_1()
                            .border_color(black())
                            .px_2()
                            .bg(yellow())
                            .child("Reset")
                            .hover(|style| {
                                style
                                    .bg(yellow().blend(opaque_grey(0.5, 0.5)))
                                    .cursor_pointer()
                            })
                            .on_mouse_up(MouseButton::Left, cx.listener(Self::on_reset_click)),
                    ),
            )
            .child(self.text_input.clone())
            .children(self.recent_keystrokes.iter().rev().map(|ks| {
                format!(
                    "{:} {}",
                    ks.unparse(),
                    if let Some(key_char) = ks.key_char.as_ref() {
                        format!("-> {:?}", key_char)
                    } else {
                        "".to_owned()
                    }
                )
            })
        )
    }
}
focus_handle() 方法用于返回组件的焦点句柄,以便 GPUI 能够正确地管理焦点状态。on_reset_click() 方法用于处理重置按钮的点击事件,清除最近的按键记录并重置文本输入状态。用 on_mouse_up() 方法将这个事件处理器绑定到重置按钮上。
最后,在 main() 函数中创建并运行应用程序:
fn main() {
    Application::new().run(|cx: &mut App| {
        let bounds = Bounds::centered(None, size(px(300.0), px(300.0)), cx);
        cx.bind_keys([
            KeyBinding::new("backspace", Backspace, None),
            KeyBinding::new("delete", Delete, None),
            KeyBinding::new("left", Left, None),
            KeyBinding::new("right", Right, None),
            KeyBinding::new("shift-left", SelectLeft, None),
            KeyBinding::new("shift-right", SelectRight, None),
            KeyBinding::new("cmd-a", SelectAll, None),
            KeyBinding::new("cmd-v", Paste, None),
            KeyBinding::new("cmd-c", Copy, None),
            KeyBinding::new("cmd-x", Cut, None),
            KeyBinding::new("home", Home, None),
            KeyBinding::new("end", End, None),
            KeyBinding::new("ctrl-cmd-space", ShowCharacterPalette, None),
        ]);

        let window = cx
            .open_window(
                WindowOptions {
                    window_bounds: Some(WindowBounds::Windowed(bounds)),
                    ..Default::default()
                },
                |_, cx| {
                    let text_input = cx.new(|cx| TextInput {
                        focus_handle: cx.focus_handle(),
                        content: "".into(),
                        placeholder: "Type here...".into(),
                        selected_range: 0..0,
                        selection_reversed: false,
                        marked_range: None,
                        last_layout: None,
                        last_bounds: None,
                        is_selecting: false,
                    });
                    cx.new(|cx| InputExample {
                        text_input,
                        recent_keystrokes: vec![],
                        focus_handle: cx.focus_handle(),
                    })
                },
            )
            .unwrap();
        let view = window.update(cx, |_, _, cx| cx.entity()).unwrap();
        cx.observe_keystrokes(move |ev, _, cx| {
            view.update(cx, |view, cx| {
                view.recent_keystrokes.push(ev.keystroke.clone());
                cx.notify();
            })
        })
        .detach();
        cx.on_keyboard_layout_change({
            move |cx| {
                window.update(cx, |_, _, cx| cx.notify()).ok();
            }
        })
        .detach();

        window
            .update(cx, |view, window, cx| {
                window.focus(&view.text_input.focus_handle(cx));
                cx.activate(true);
            })
            .unwrap();
        cx.on_action(|_: &Quit, cx| cx.quit());
        cx.bind_keys([KeyBinding::new("cmd-q", Quit, None)]);
    });
}
我们发现,这个新建方式和之前的示例有些不同。首先,我们在 main() 函数中创建了一个新的应用程序实例,并在其中打开了一个窗口。窗口的内容由一个闭包定义,在这个闭包中我们创建了 TextInput 和 InputExample 实体,并将它们绑定到窗口上。我们还绑定了一系列键盘事件,以便在用户按下特定键时触发相应的事件处理器。例如,当用户按下 Backspace 键时,会触发 Backspace 事件,从而调用 TextInput 中定义的 backspace() 方法来处理删除操作。这些事件绑定在 bind_keys() 方法中进行设置,确保了用户的输入能够正确地被捕获和处理。此外,我们还设置了一个观察者来监听键盘布局的变化,以便在用户切换键盘布局时能够及时更新界面。这个功能在 on_keyboard_layout_change() 方法中实现,当键盘布局发生变化时,我们调用 window.update() 来通知界面重新渲染,从而确保显示的键盘布局信息是最新的。
在这些之后还有一个 window.update() 调用,用于在窗口创建后立即将焦点设置到文本输入组件上,并激活应用程序,使其准备好接受用户输入。
通过调试发现,其实窗口创建发生于 new() 之后,而窗口内容的创建发生于 run() 之后。这也是为什么我们需要在 run() 中进行窗口内容的定义和事件绑定的原因。
未完待续

文章评论